I finally got around to tinkering with the Raspberry Pi hardware. A while ago I'd ordered a basic electronic kit from ebay with a breadboard and a bunch of electronic components (resistors, cables, etc) in it. I started with a rather elementary project: control of an LED and a push-button from the Pi. Despite its apparent simplicity it's a good opportunity re-learn some basics: which is the anode/cathode of the LED? What's a pull-up/pull-down resistor? and so on...
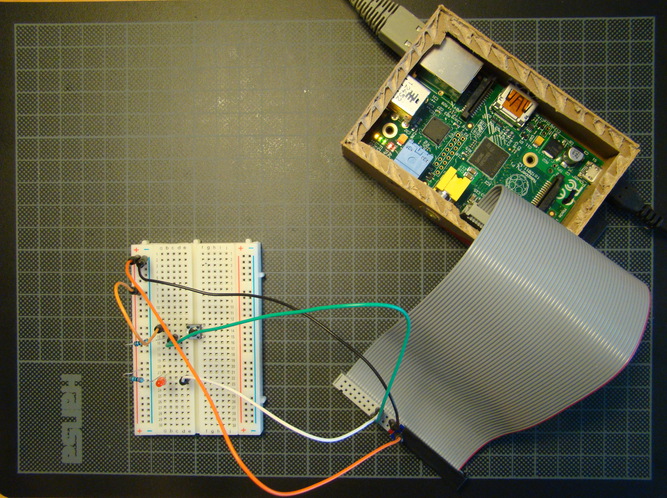
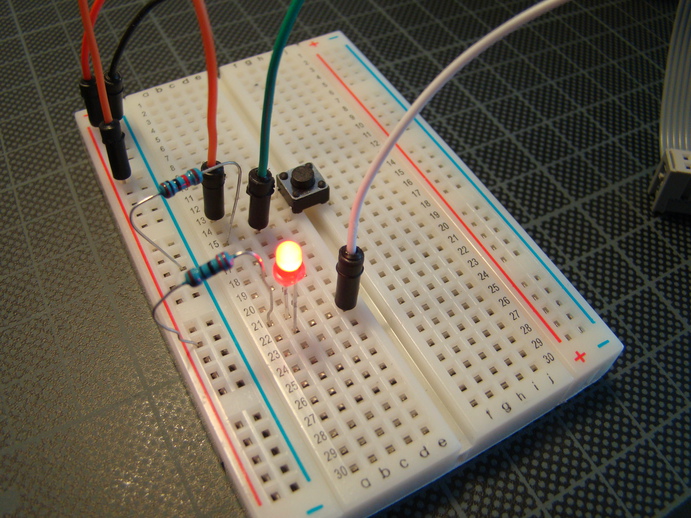
Here's the final 'product':


I needed to cut open up my fancy cardboard case :-( to gain access to the GPIO ports on the Pi. I may design a new case in the future, one that allows direct connection to the board.
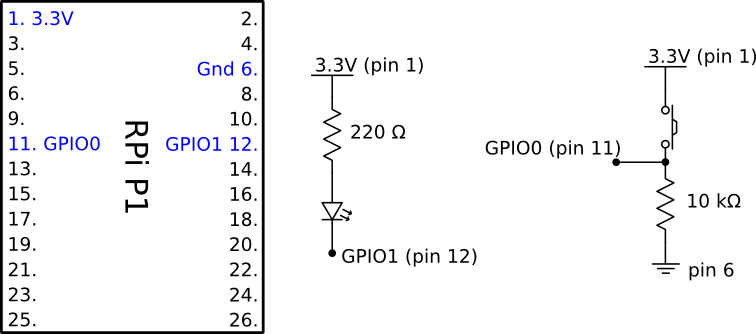
I drew the circuit diagram using the circuit symbol set for Inkscape.

The drive this wonderful piece of hardware, I wrote the following code that makes the LED blinking (yaaaay):
# led_blink.py
import time
import RPi.GPIO as GPIO

# Set the mode of numbering the pins.
GPIO.setmode(GPIO.BOARD)
GPIO.setup(12, GPIO.OUT)

# Initialise GPIO10 to high (true) so that the LED is off.
status = True
while 1:
        GPIO.output(12, status)
        status = not status
        time.sleep(1)
and this program turns the LED on when the button is pressed:
# led_button.py
import RPi.GPIO as GPIO

# Set the mode of numbering the pins.
GPIO.setmode(GPIO.BOARD)
GPIO.setup(11, GPIO.IN)
GPIO.setup(12, GPIO.OUT)

# Initialise to high (true) so that the LED is off.
GPIO.output(12, True)

button_pressed = False
while 1:
    if GPIO.input(11):
        if not button_pressed:
                print 'Button pressed.'
                button_pressed = True
        GPIO.output(12, False)
    else:
        if button_pressed:
                print 'Button released.'
                button_pressed = False
        # When the button switch is not pressed, turn off the LED.
        GPIO.output(12, True)
I took the inspiration and some sample code from the following places: